To configure your avast! Premium Business Endpoint Security console using best practices:
1) Login to your console from here:
https://business.avast.com using your APBS login email address
2) I will have your license applied to your console for the correct expiration date.
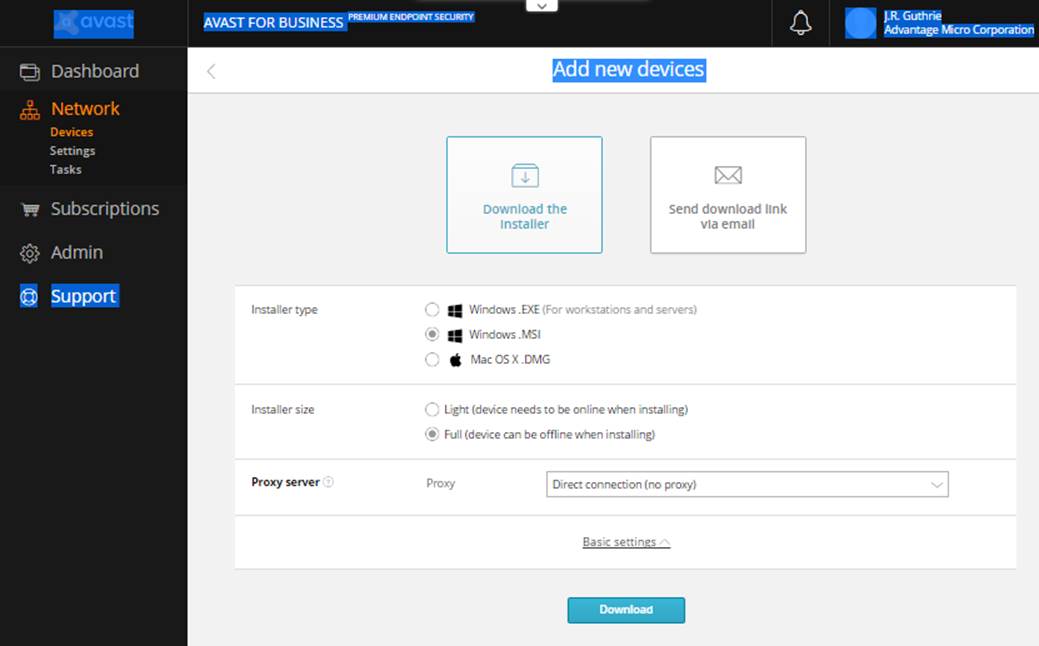
3) Installers are downloaded from the console under “Add new devices” and have a 30 day trial embedded.
NOTE: If the system was using any previous version of avast!, then it is highly recommended to use the avast! removal tool (see #7 below)
 INSTALLERS
Now we have the selection of Installer type, Installer size, Proxy server, Download, or Send by email:
4) After installation, the system requires a reboot to show up in the console Dashboard under ACTIVATION
5) You must activate each system in the console under “Activate now”, a reboot message will pop up on the freshly activated system.
6) Note that previous avast! installation directories must be removed for best results:
C:\Program Files\AVAST Software and
C:\ProgramData\AVAST Software
7) There are MSI installers under “Add Devices” and a MSI removal tool for the legacy avast! Endpoint Protection. I will email the avast! removal techniques.
8) Avast! “Hardened Mode” (whitelisting) is disabled by default, as it may require exclusions. The “Aggressive” setting blocks RanSim (ransomware simulator) and is highly recommended. Any other setting allows RanSim to encrypt files!
9) Virtualization of Adobe Flash is highly recommended, as this removes the number 1 vulnerability vector of all time! This can be done in your avast console and is shown below.
10) I have included exclusion nomenclature at the bottom of this document, as it is different than all previous versions (see exclusion section below)
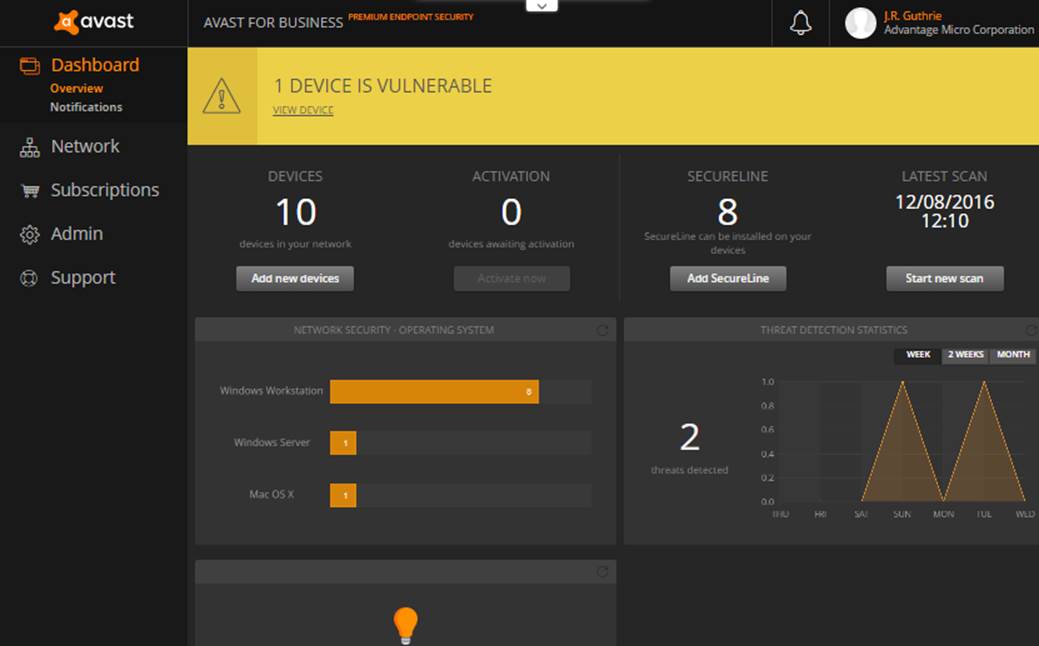
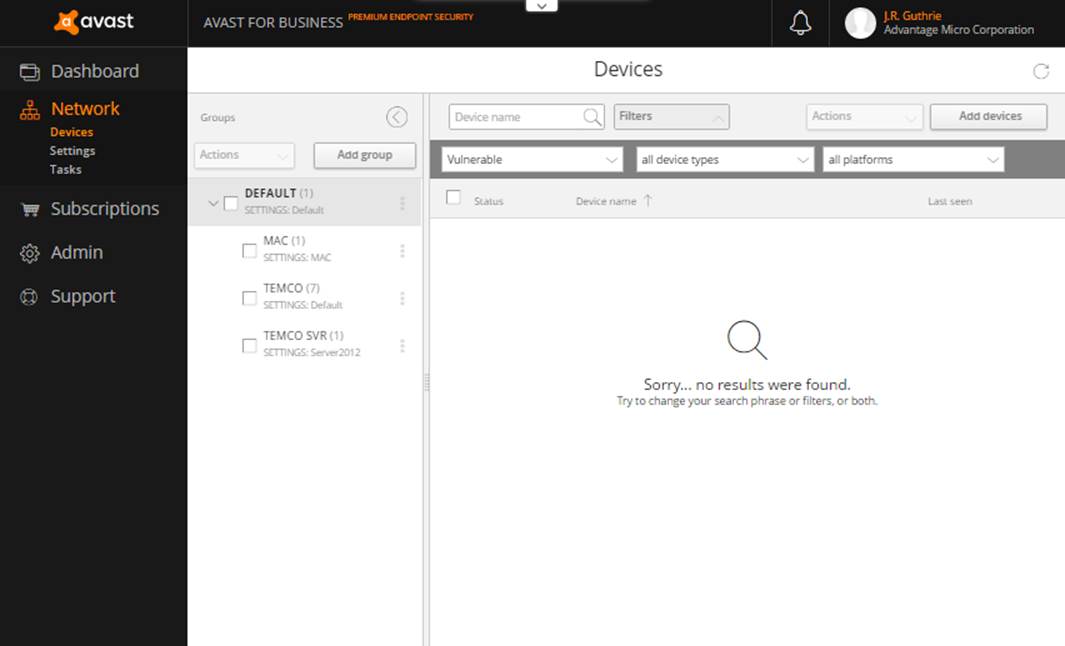
11) After devices are Activated, they will show up in the default group, using the default template. You can have many different groups and templates to match any required variables:
The “
J.R. BEST PRACTICES” settings below are aggressive and provide the best protection. However, I highly recommend testing on one or more systems prior to deploying. Run all your apps to verify if any exclusions are needed. Exclusion terminology is different from previous avast! versions, so I have included examples at the bottom of this document.
TEMPLATES
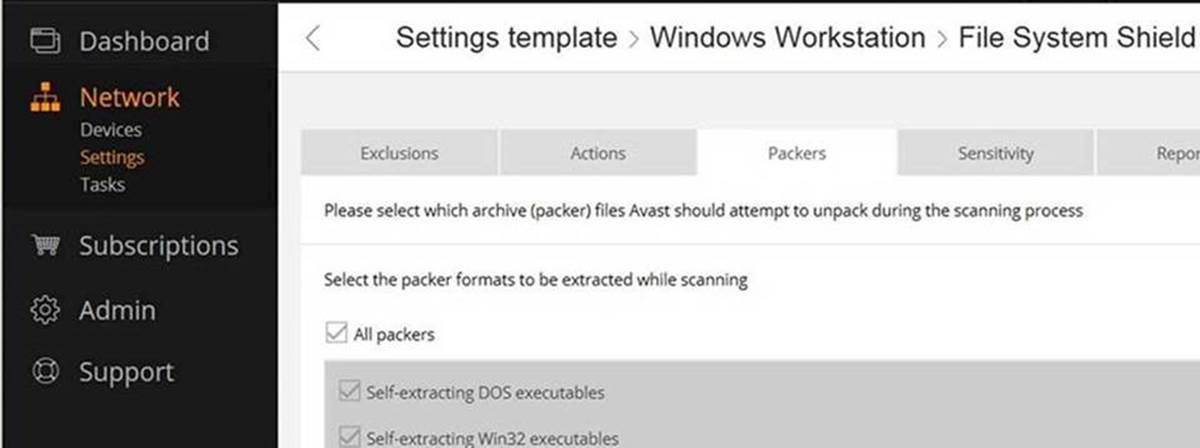
From Network, Settings, Default, Advanced: use the following settings for BEST protection:

File System Shield, Customize, Packers: All
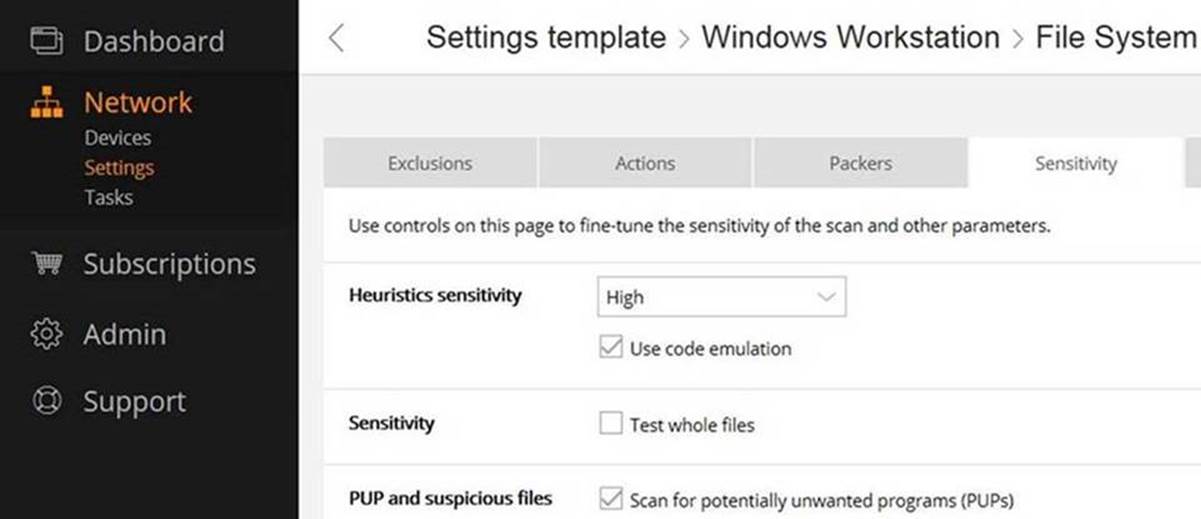
File System Shield, Customize, Sensitivity: High and PUPs
Mail Shield, Customize, Sensitivity: High and PUPs

Web Shield, Customize, Sensitivity: High and PUPs

Antispam, Customize, Sensitivity: High, Add recipients of outbound to whitelist, Add entries from address book to whitelist:

Sandbox, Customize, Virtualized processes, Path to the application: C:\Program Files (x86)\Adobe\Flash Player
Sandbox, Customize, Virtualized processes, Path to the folder: C:\Program Files (x86)\Adobe\Flash Player\*
Sandbox, Customize, Virtualized processes, Path to the folder: C:\Windows\System32\Macromed\Flash\*

Under the General settings tab: set a template password to prevent users from disabling protection, and change Program updates to manual:

Under the Antivirus settings tab: setting Hardened mode to Aggressive may require exclusions so test first before enabling (currently disabled) This setting provides the maximum protection from Ransomware.
 EXCLUSIONS
Under notifications in the console, it will tell you what is blocked by what shield. Then we can insert those items as exclusions in the console. Note that some of the similar fields use different nomenclature. Also, we can use the avast! “false positive” reporting module, and then those false positives are whitelisted within 24 hours most of the time.
Avast! False Positive File Form submission:
https://www.avast.com/false-positive-file-form.php
To add exclusions for Avast Premium Endpoint Security, they must be performed in the console web portal:
https://business.avast.com Adding exclusions in the web portal will allow the change to sync to all computers. Login to
https://business.avast.com/ and go to:
Network > Settings > Choose the target Template > Advanced > Antivirus Settings:
Executables in File Path Exclusions: Example: C:\Program Files\AVAST Software\Avast\example.exe Add like this: *\example.exe
File Path Exclusions: Example: C:\Program Files\AVAST Software\Avast
Add like this: *\AVAST Software\* (for relative file path, always use ‘*’ before and after)
URL Exclusions Example:
https://business.avast.com/
Add like this: https://business.avast.com/* or *business.avast*
Site Blocking: Example:
https://www.facebook.com/
Add like this: https://www.facebook.com/* AND http://www.facebook.com/* (must use both for facebook, since both URLs exist, and https: must go 1st)
DeepScreen Exclusions: Example: C:\Program Files\AVAST Software\Avast\tools.exe
Add like this: C:\Program Files\AVAST Software\Avast\* or *\AVAST Software\*
Hardened Mode Exclusions: Example: C:\Program Files\AVAST Software\Avast\tools.exe
Add like this: C:\Program Files\AVAST Software\Avast\tools.exe (full path is required, no wild cards or directories are valid)
FIREWALL
avast! Firewall Troubleshooting Guide – Avast for Business
Please let me know if you have any questions, and have a great day!


