Duplicate your desired template and name it “EXCLUSION TEST” or whatever you want it to be. Now we want to edit those template settings:
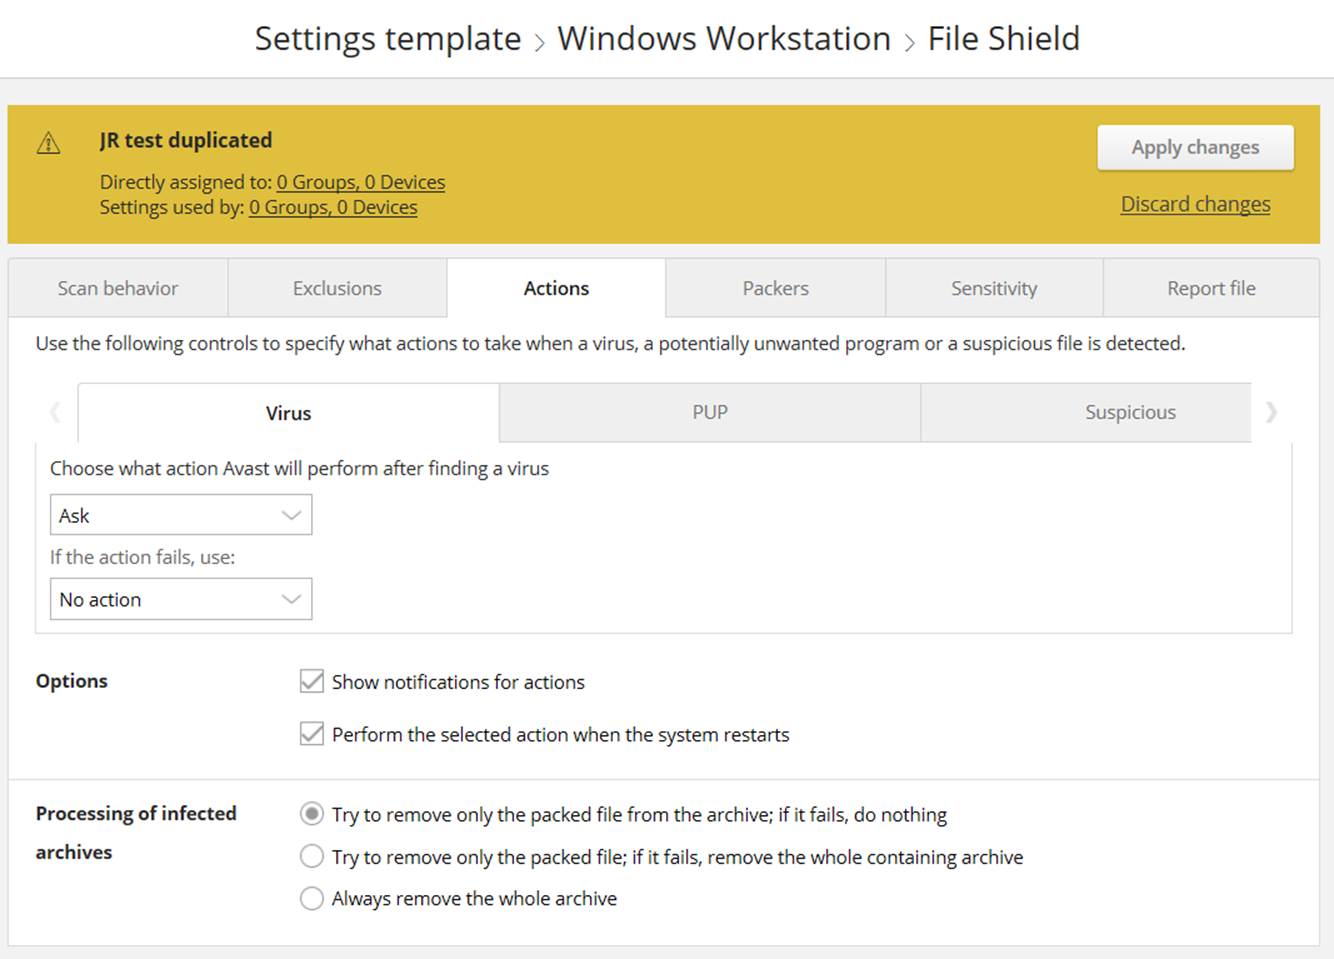
Under the Active Protection tab, File System Shield, Customize, Actions, Virus, and set “Choose what action Avast will perform” and set to “Ask”
then under Options, select “Show notifications for actions”. Select exactly the same settings / options for both PUP & Suspicious tabs:
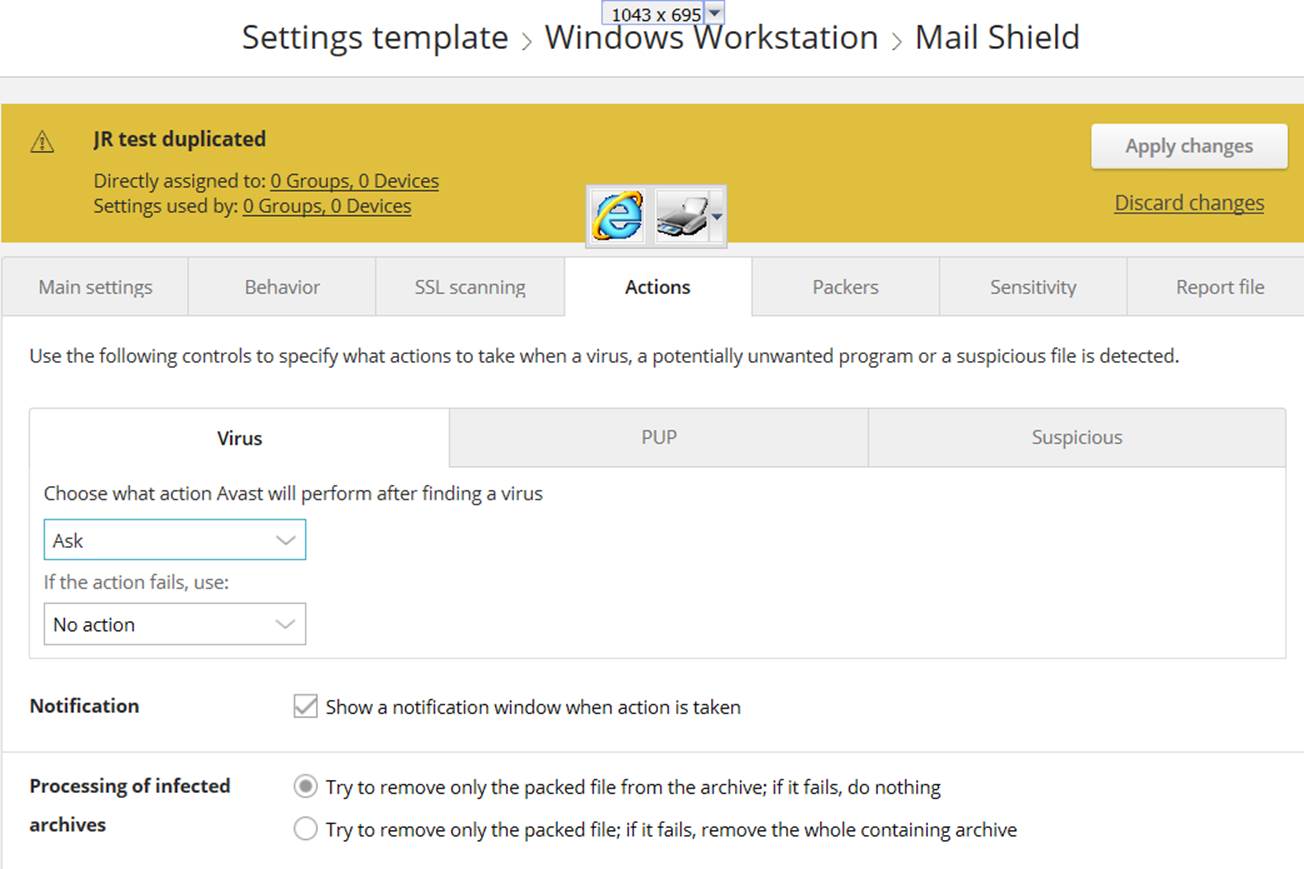
 Go to Mail Shield, Customize, Actions, Virus, and set “Choose what action Avast will perform” and set to “Ask”, then under Options, select “Show notifications for actions”. Select exactly the same settings / options for both PUP & Suspicious tabs:
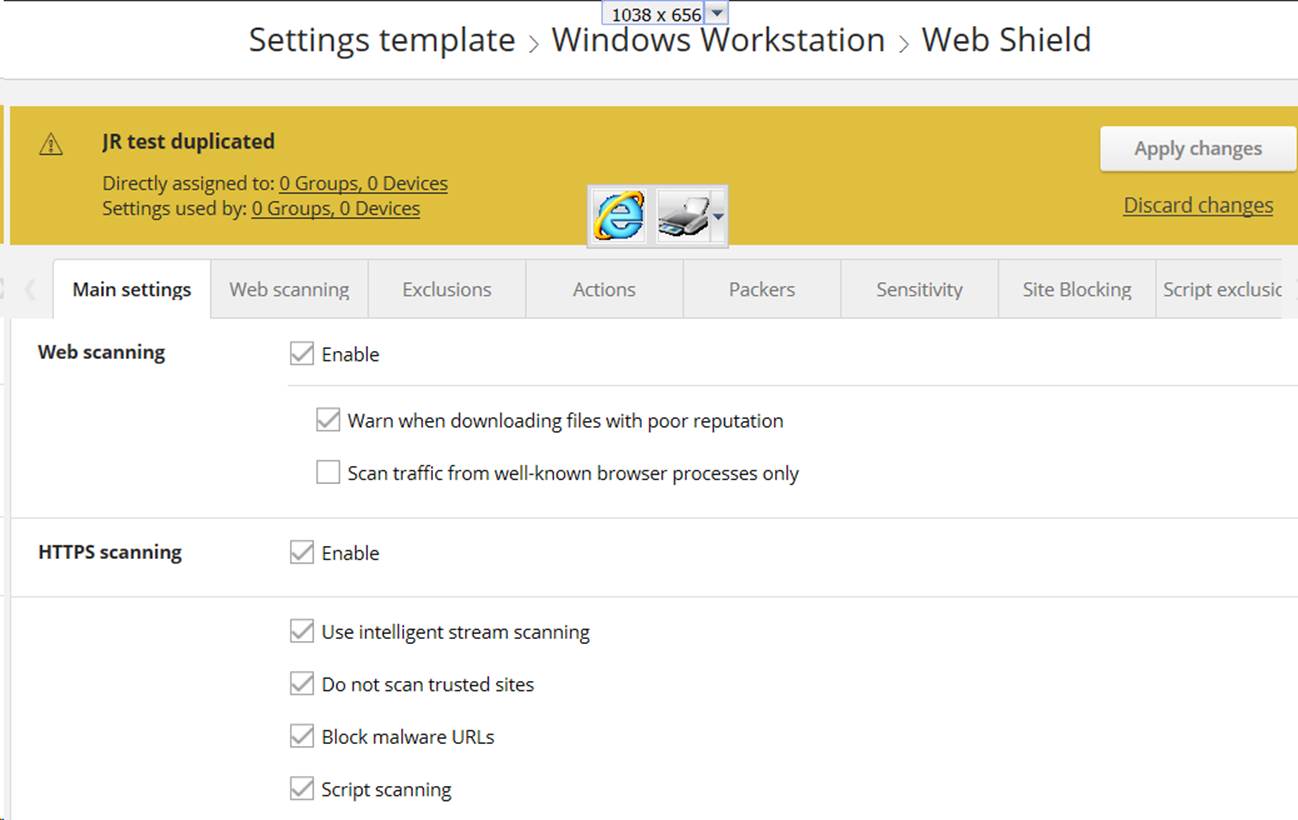
 Go to Web Shield, Customize, Main settings, Web scanning, and select both “Enable” and “Warn when downloading files with poor reputation”,
Then go to the Actions tab, Virus, and set “Choose what action Avast will perform” and set to “Ask”, then under Options, select “Show notifications for actions”. Select exactly the same settings / options for both PUP & Suspicious tabs:
Go to Web Shield, Customize, Main settings, Web scanning, and select both “Enable” and “Warn when downloading files with poor reputation”,
Then go to the Actions tab, Virus, and set “Choose what action Avast will perform” and set to “Ask”, then under Options, select “Show notifications for actions”. Select exactly the same settings / options for both PUP & Suspicious tabs:
 For Premium clients, go to Firewall, Customize, Rules, Application rules, “For applications with no definded rules, allow the following” and set to:
“Ask user” then clear the check box ““Control all rules via the webconsole”. Note that Applications with defined rules will overwrite the “Ask User” Setting.
For Premium clients, go to Firewall, Customize, Rules, Application rules, “For applications with no definded rules, allow the following” and set to:
“Ask user” then clear the check box ““Control all rules via the webconsole”. Note that Applications with defined rules will overwrite the “Ask User” Setting.
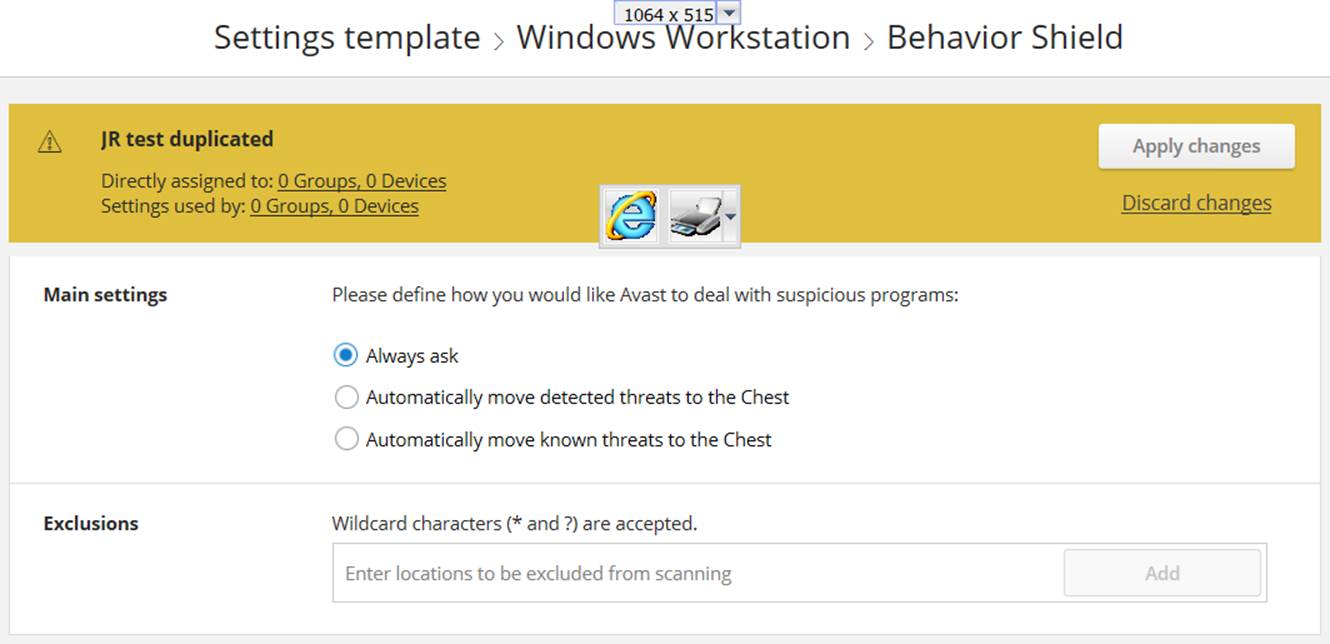
 Go to Behavior Shield, Customize, Main settings, Web scanning, and select “Always ask”
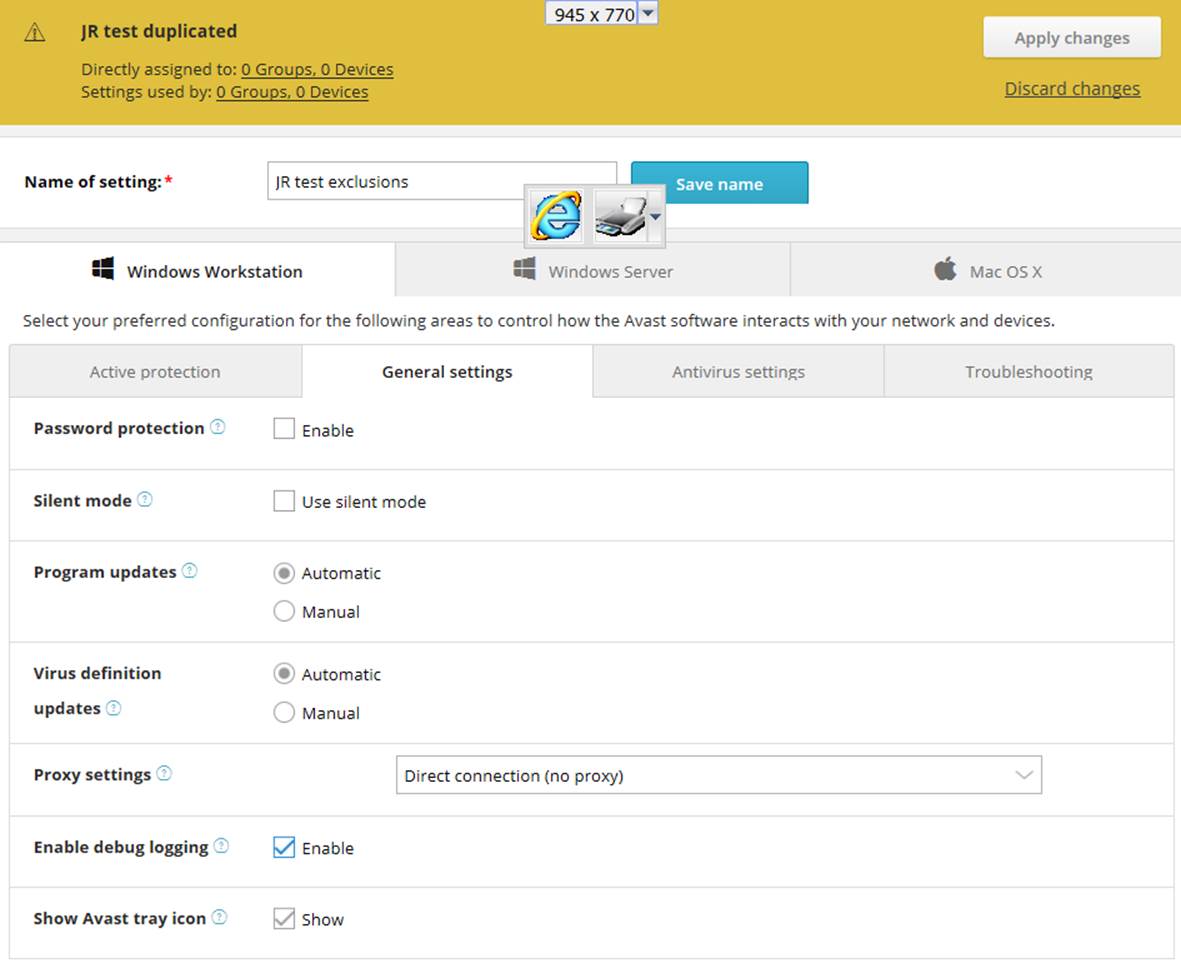
 Next we want to open the General settings tab, and clear the check boxes for Password protection and Silent mode.
 Next we want to open the Antivirus settings tab, and under CyberCapture, select “Allow me to run suspicious files”
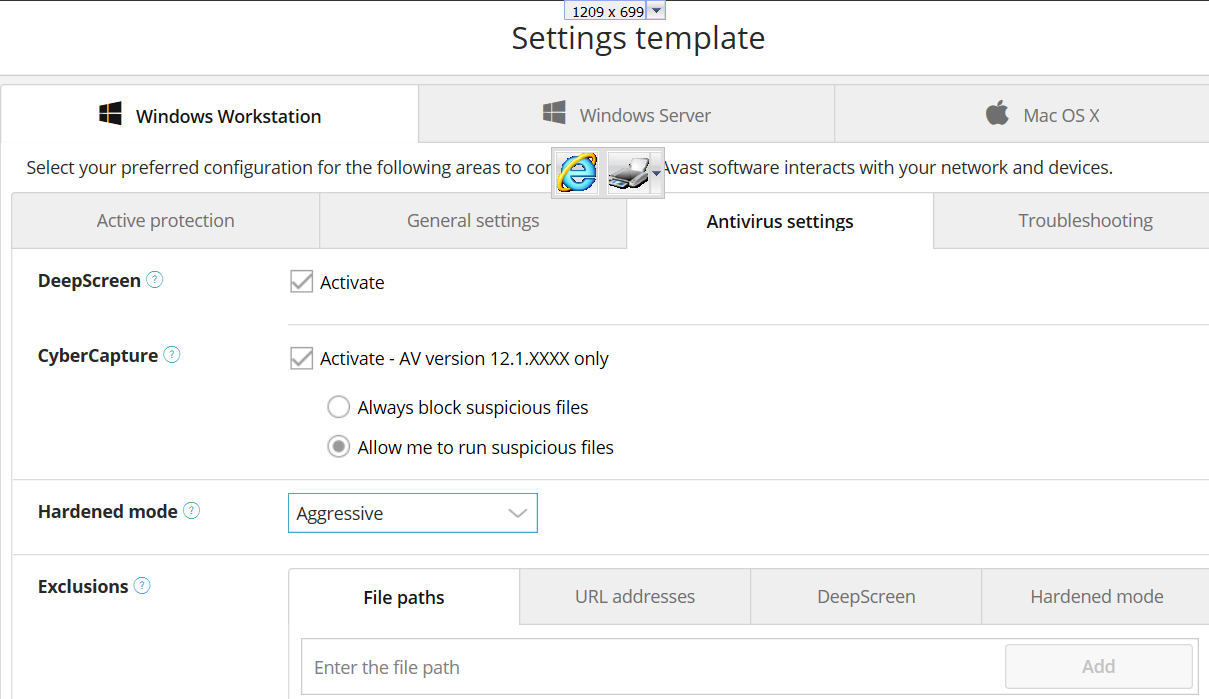
Sometimes “Hardened mode” will need to disabled to verify it is not blocking any executable files, but the “Aggressive” setting proives the
Best protection. Do not forget to “Apply changes”. Note this is also the location where all exclusions are entered, with the exception of the
Behavioral Shield.
EXCLUSIONS
Under notifications in the console, it will tell you what is blocked by what shield. Then we can insert those items as exclusions in the console. Note that some of the similar fields use different nomenclature. Also, we can use the avast! “false positive” reporting module, and then those false positives are whitelisted within 24 hours most of the time.
Avast! False Positive File Form submission:
https://www.avast.com/false-positive-file-form.php
To add exclusions for Avast Premium Endpoint Security, they must be performed in the console web portal:
https://business.avast.com Adding exclusions in the web portal will allow the change to sync to all computers. Login to
https://business.avast.com/ and go to:
Network > Settings > Choose the target Template > Advanced > Antivirus Settings:
Executables in File Path Exclusions: Example: C:\Program Files\AVAST Software\Avast\example.exe Add like this: *\example.exe
File Path Exclusions: Example: C:\Program Files\AVAST Software\Avast
Add like this: *\AVAST Software\* (for relative file path, always use ‘*’ before and after)
URL Exclusions Example:
https://business.avast.com/
Add like this:
https://business.avast.com/* or *business.avast*
Site Blocking: Example:
https://www.facebook.com/
Add like this:
https://www.facebook.com/* AND
http://www.facebook.com/* (must use both for facebook, since both URLs exist, and https: must go 1st)
DeepScreen Exclusions: Example: C:\Program Files\AVAST Software\Avast\tools.exe
Add like this: C:\Program Files\AVAST Software\Avast\* or *\AVAST Software\*
Hardened Mode Exclusions: Example: C:\Program Files\AVAST Software\Avast\tools.exe
Add like this: C:\Program Files\AVAST Software\Avast\tools.exe (full path is required, no wild cards or directories are valid)
Please let me know if you have any questions, and have a great day!


